And we are done
Ready for shipping. Greg added the magnet and sheet metal to the back door so it closes without an exterior latch. It works perfectly! Next step, write my note and pack it up. Fingers crossed that Brian and Dawn like it.

Nesting with love builds a home
Ready for shipping. Greg added the magnet and sheet metal to the back door so it closes without an exterior latch. It works perfectly! Next step, write my note and pack it up. Fingers crossed that Brian and Dawn like it.


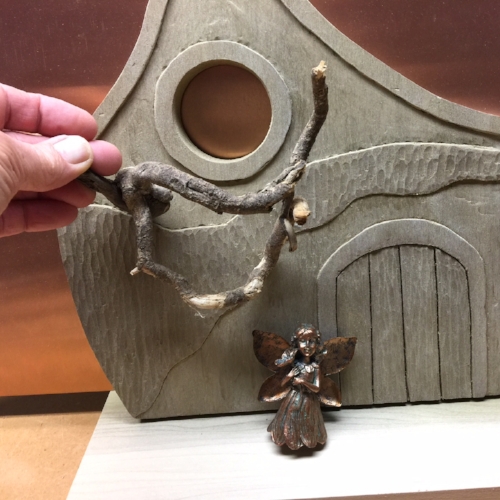
We made a few adjustments from the original design. We moved the chimney to the other side. What I didn't plan for was leaving the "inspiration" piece off... the fairy. I took several pics with her placed and then without to get feedback from some family and friends. Ultimately, I didn't think she was needed, and my daughter agreed. That was enough for me. You can always add later, but removal has consequences. Let me know what you think based on the sample pics below.


I have rechilled, dremeled, and restained where needed. We are getting close to assembly day, but still have to make some decisions on the stain of the base. More to come.

Sometimes even if you test stain on a simular piece of wood, it still doesn't workout the way you want. If you don't like it, fix it. It's wood and it can be resanded, rechisseled, or dremeled. Do the extra work to make sure you like it!


All the wood is cut and ready for stain. We begin detail work tomorrow, which includes making a final decision on stain and the perch. Fingers crossed.

Today we cut the sideboards for the house. We have typically just rounded the edges to create a slight definition between each board, keeping the top smooth. This time we added a texture using the belt sander that gave it a hand carved/log look.

I ordered dollhouse door hinges for the (faux) front door. They are awesome and exactly what I needed to complete the look. I researched options to make them myself but it didn't look promising. These are perfect!
I will post the sellers info shortly. I bought these on eBay and they were shipped from the UK.

I just finished the chisel/carving work for the front and back. Now we focus on the side cuts and sanding the curves. Plus, Dad (Papa) just dropped off a cool belt sander, which will make this process even more fun! Can't wait.

As with every house I have ever worked on, mistakes happen. Here is my advice, if it isn't catastrophic, keep going. I have two so far on this project. The most noticeable is the chunk I chiseled off on the roof line. I have the piece so I'm debating whether I'll glue it back on. Time will tell, but I'm still pumped about the project and moving forward.

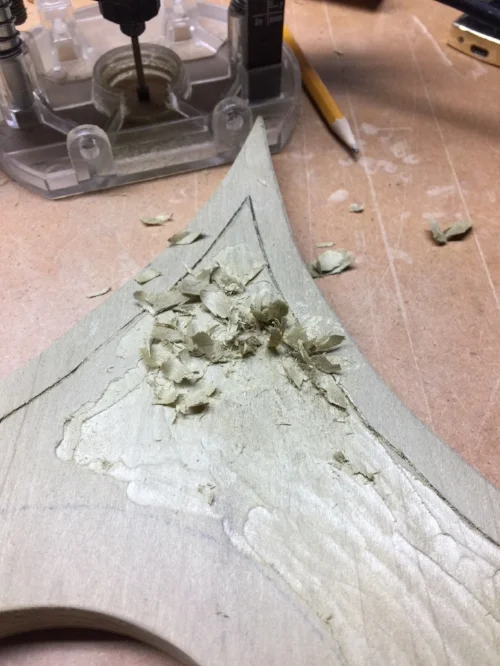
After Greg cut the wood I tried the chisel set he bought me for Christmas. It was fun, loud at times, but fun! I also cheated by using the Dremel for the bulk of the negative space. It's a huge time saver and since I haven't taken my wood carving class yet, I didn't think the purest would mind.


I use a card stock paper to create my templates. I tape them together with Frog tape (because I always have that handy) and draw out my template using nothing more than kitchen bowls and rulers. It hasn't failed me yet.

Every house starts with a design. I am rarely inspired to just build a birdhouse. I usually start a project because I want to do something special for a friend or family member, and they become my primary inspiration for the design. With a glass of wine and some paper, I begin the process with a sketch. It's messy, but this helps me to think through the project, what obstacles we may encounter during the actual build, and getting my list together for the materials. This is my sketch for my current project. Again, messy, but it is just enough for me to explain it to Greg and begin the next process, which is creating the template for the wood.

Design sketch for the Fairy House. It's kind of fun to go back when we are done to see how close we got to the original concept.